Package Contents
 |
|---|
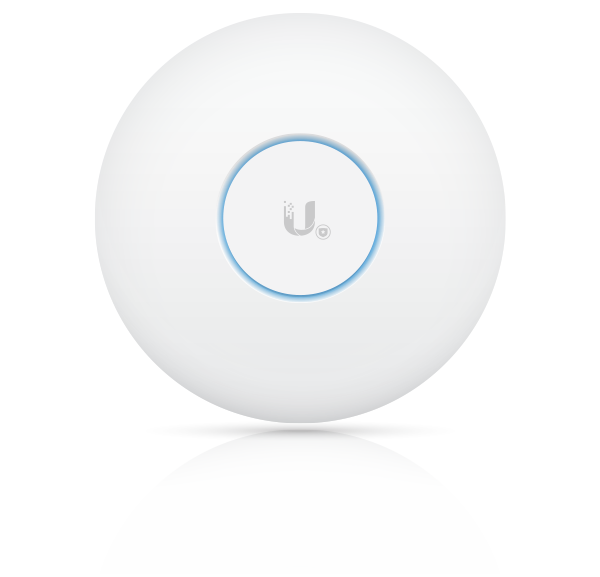
| UniFi AP AC SHD |
 |
|---|
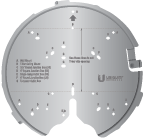
| Mounting Plate |
 |
|---|
| Ceiling Backing Plate |
 |
|---|
| Ceiling Screws (Qty. 4) |
 |
|---|
| Keps Nuts (Qty. 4) |
 |
|---|
| T-Bar Mounts (Qty. 2) |
 |
|---|
| T-Bar Screws (Qty. 2) |
 |
|---|
| Allen Wrench |
 |
|---|
| Wall Screws (Qty. 4) |
 |
|---|
| Screw Anchors (Qty. 4) |
 |
|---|
| Cable Feed Plug |
 |
|---|
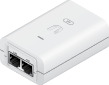
| Gigabit PoE* (48V, 0.5A) with Mount Bracket |
 |
|---|
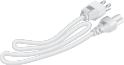
| Power Cord* |
* Included only in the single-pack of the UAP-AC-SHD
Installation Requirements
- Phillips screwdriver
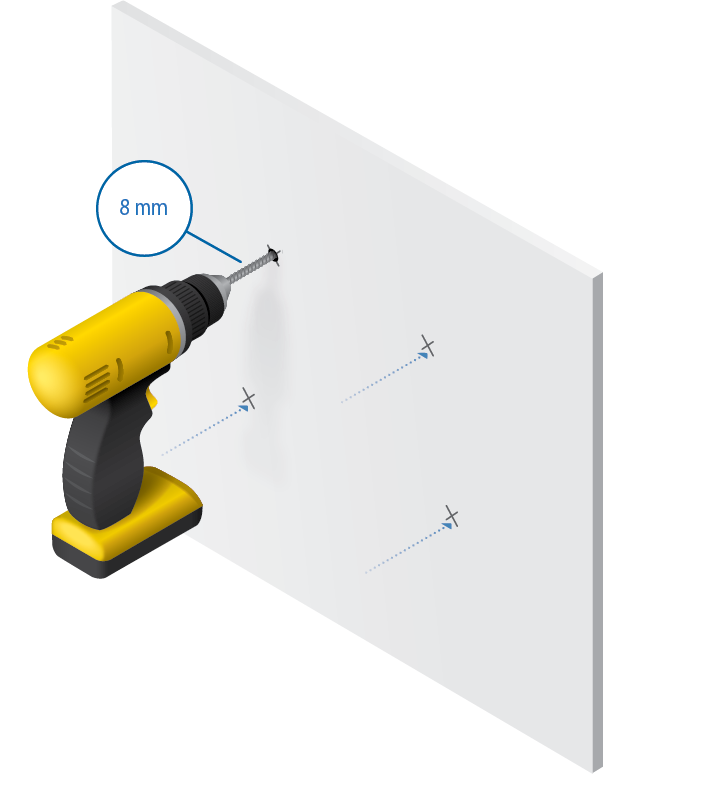
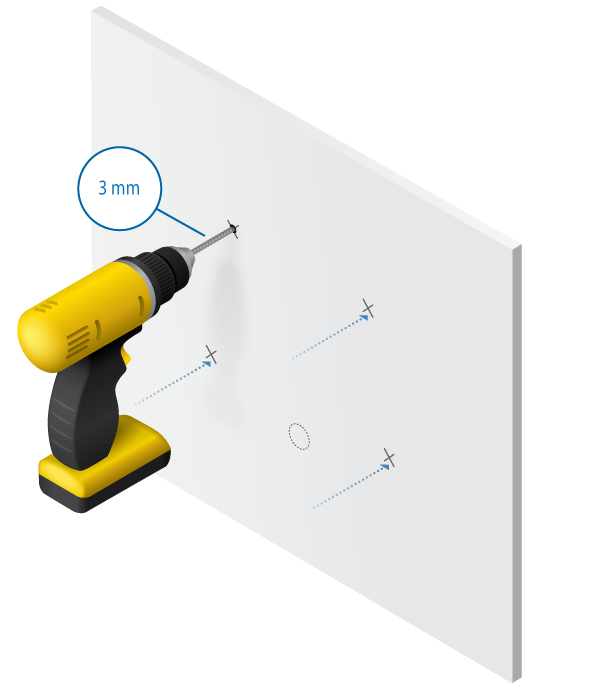
- Drill and drill bit (8 mm for wall mounting or 3 mm for ceiling tile mounting)
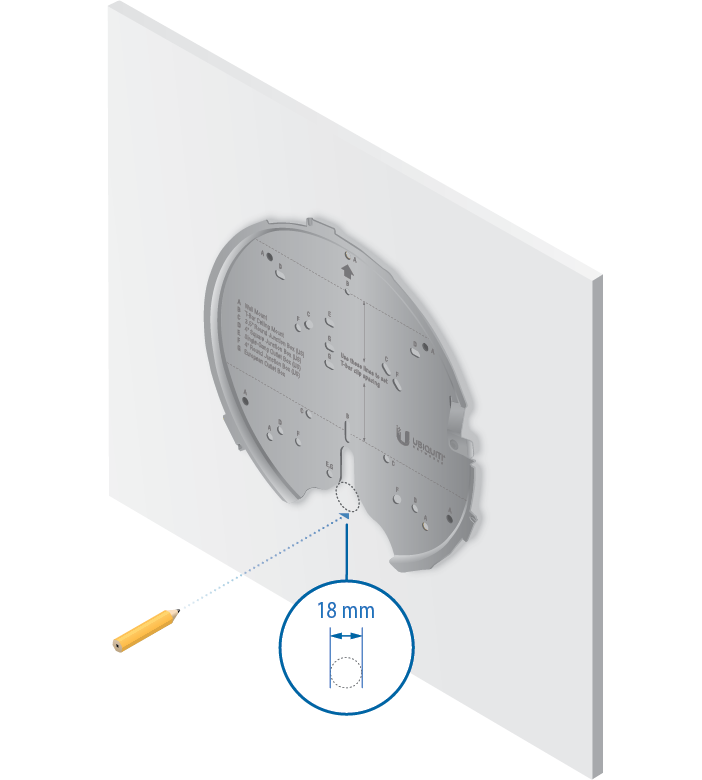
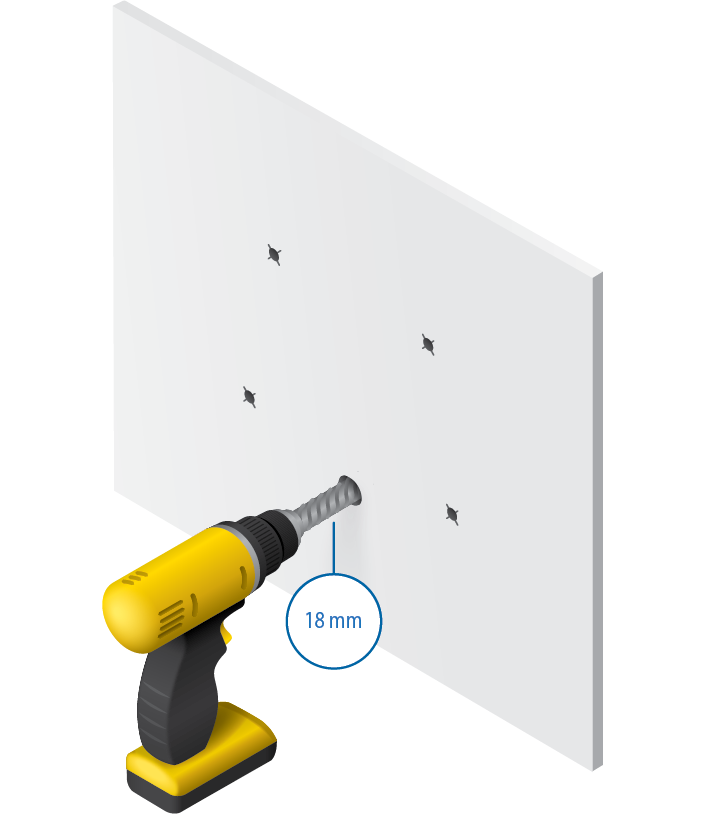
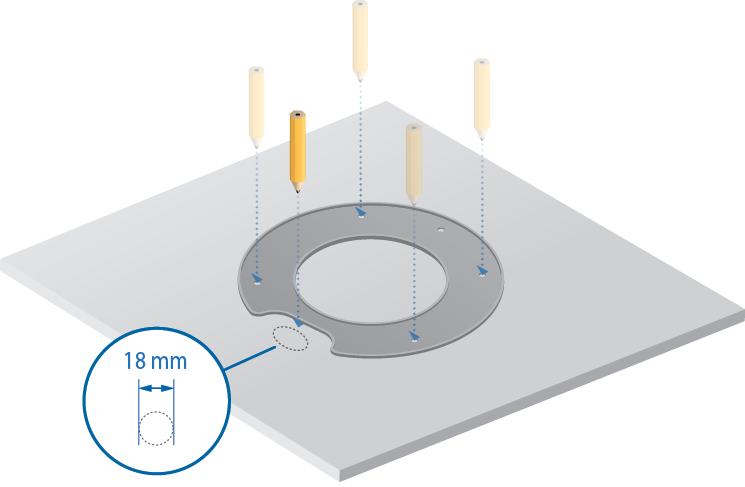
- Optional: Drywall or keyhole saw (to cut 18 mm hole for Ethernet cable feed)
- Cat5/6 UTP cable for indoor installations
|
|
IMPORTANT: The UAP-AC-SHD requires the UniFi Network Application v5.4 or higher, available at: ui.com/download/unifi |
|---|

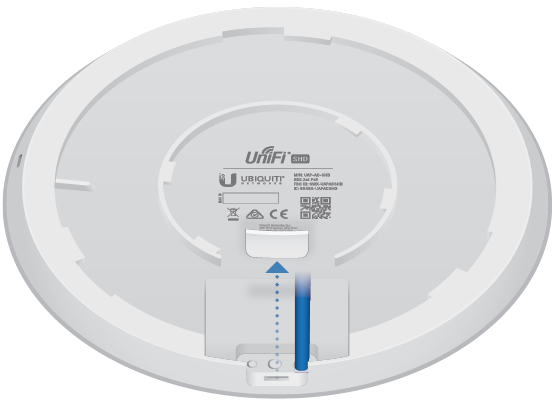
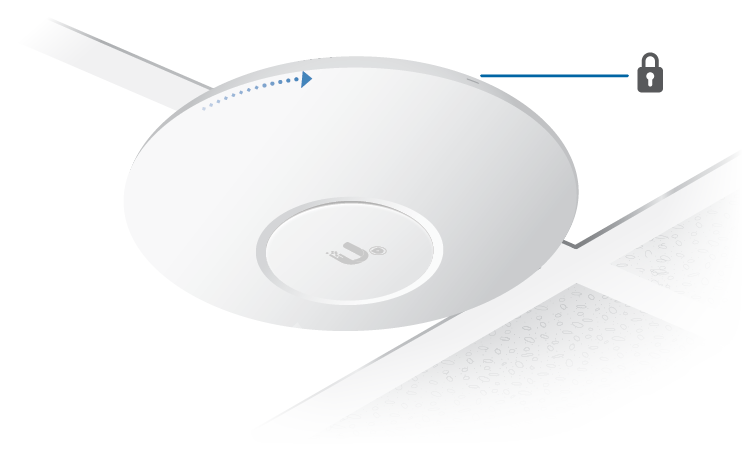
Hardware Overview
LED
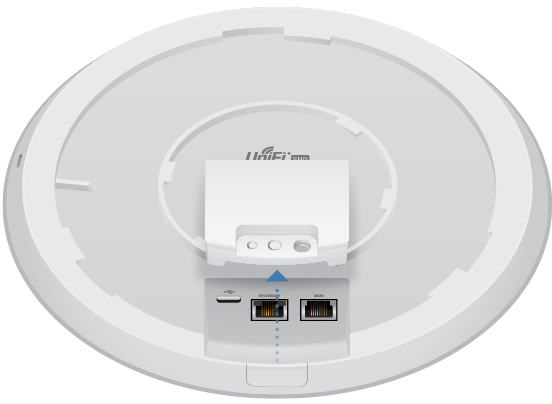
Ports
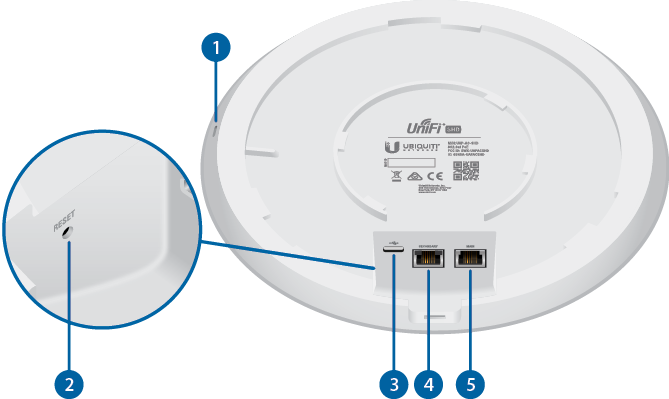
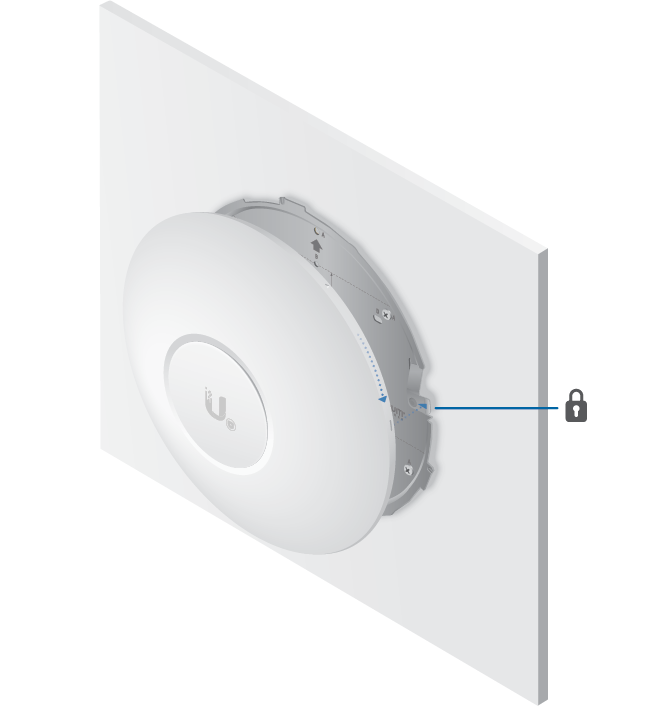
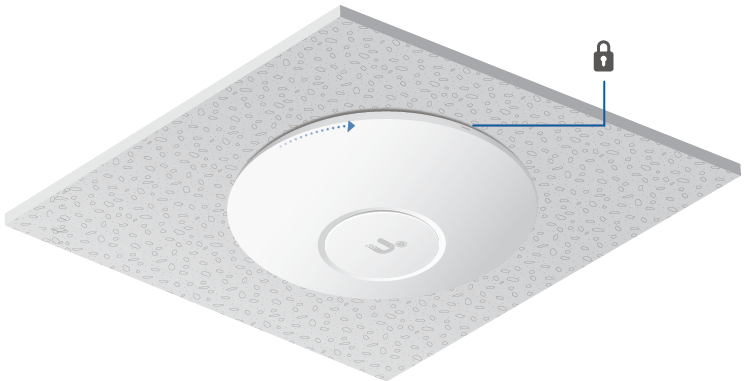
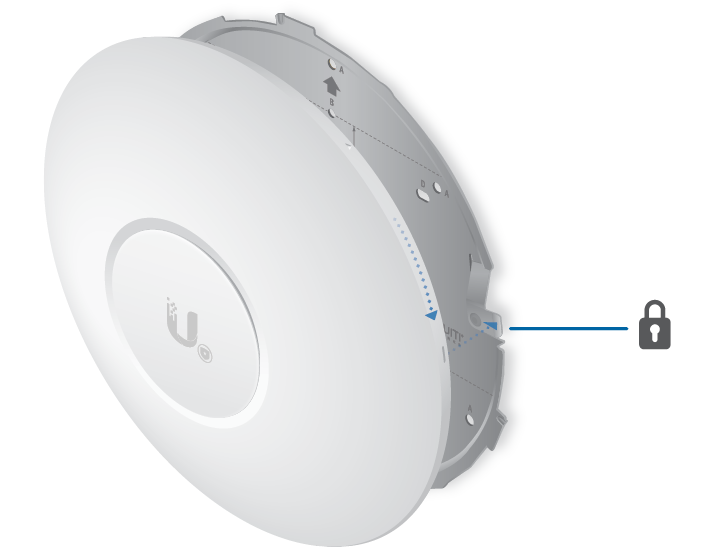
 Security Slot |
|---|
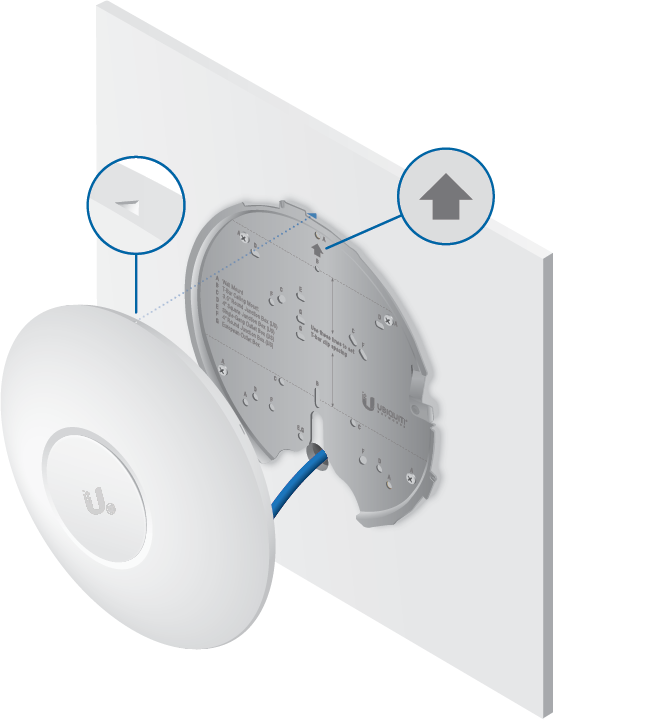
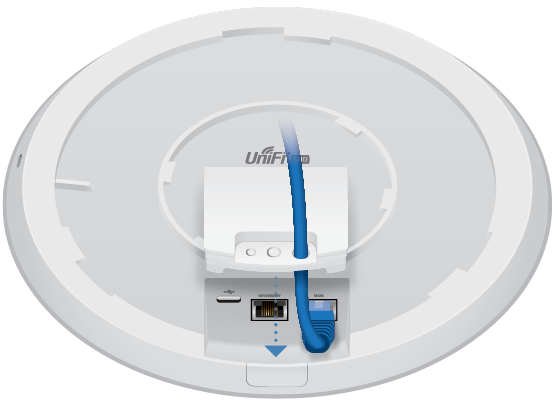
If you need to remove the UniFi AP from the Mounting Plate, insert a flat, thin object like a zip tie or large paper clip in the Security Slot to release the Lock Tab and turn the UniFi AP counterclockwise. |
 Reset |
The Reset button serves two functions for the UniFi AP:
|
 USB 3C |
The USB 3C port is reserved for future use. |
 Secondary |
The Secondary port is a Gigabit Ethernet port used for bridging. |
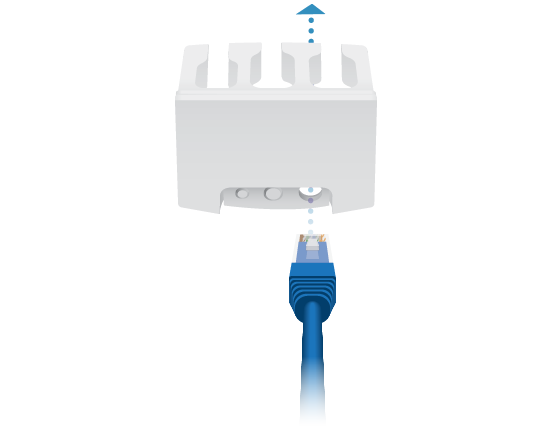
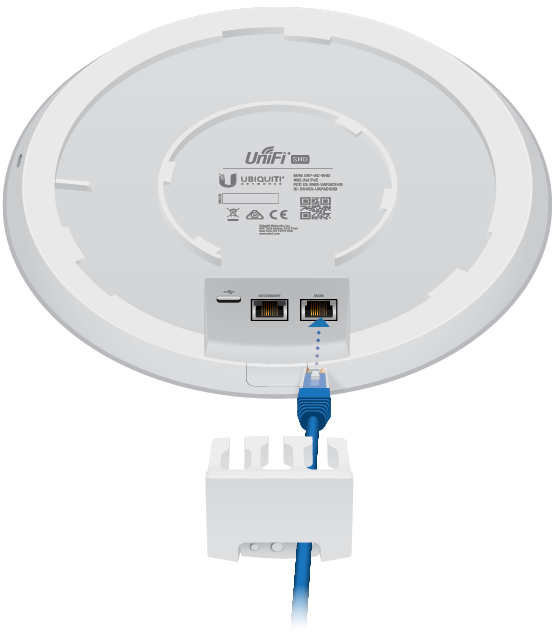
 Main |
The Main port is a Gigabit Ethernet port used to connect the power and should be connected to the LAN and DHCP server. |
|
|
IMPORTANT: The UAP-AC-SHD cannot be powered by the US-8 or US-8-60W; however, it can be powered by other UniFi PoE Switches that provide 802.3at PoE+ power. |
|---|

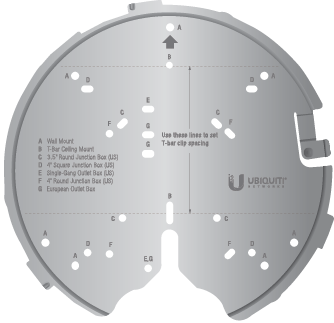
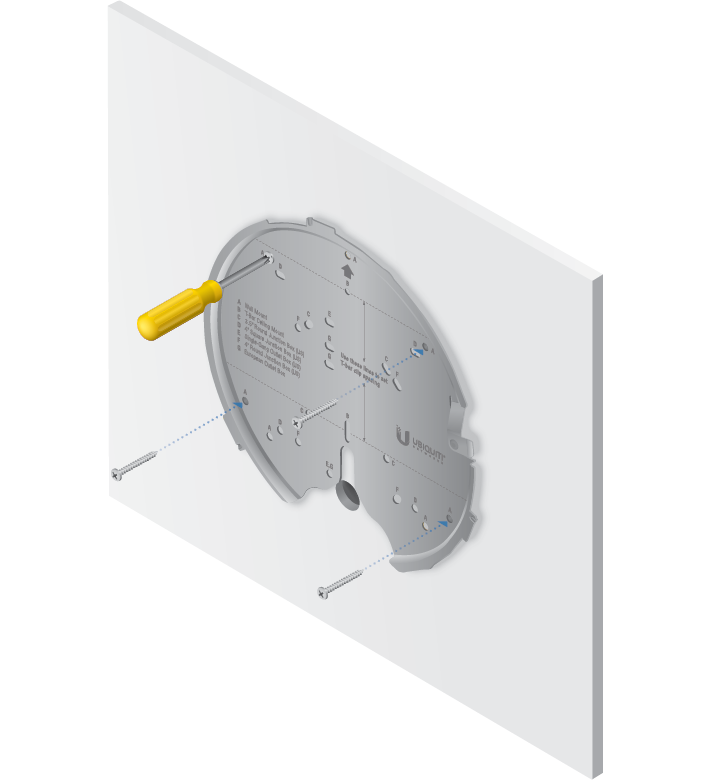
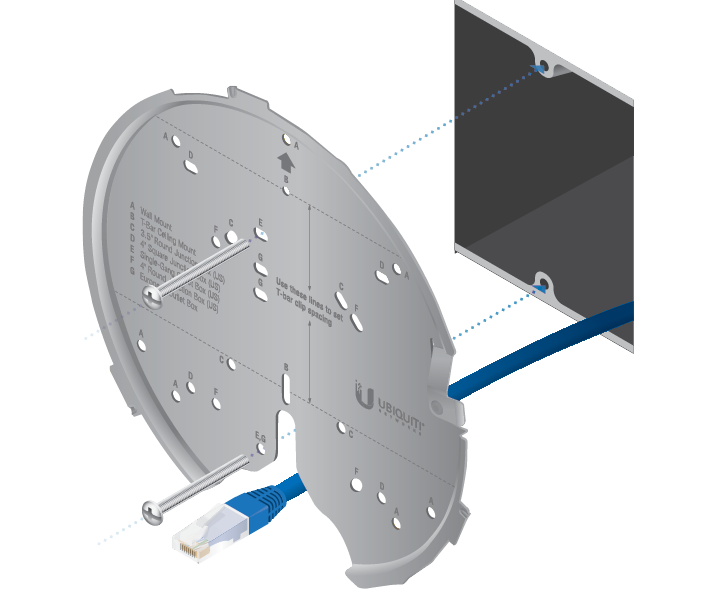
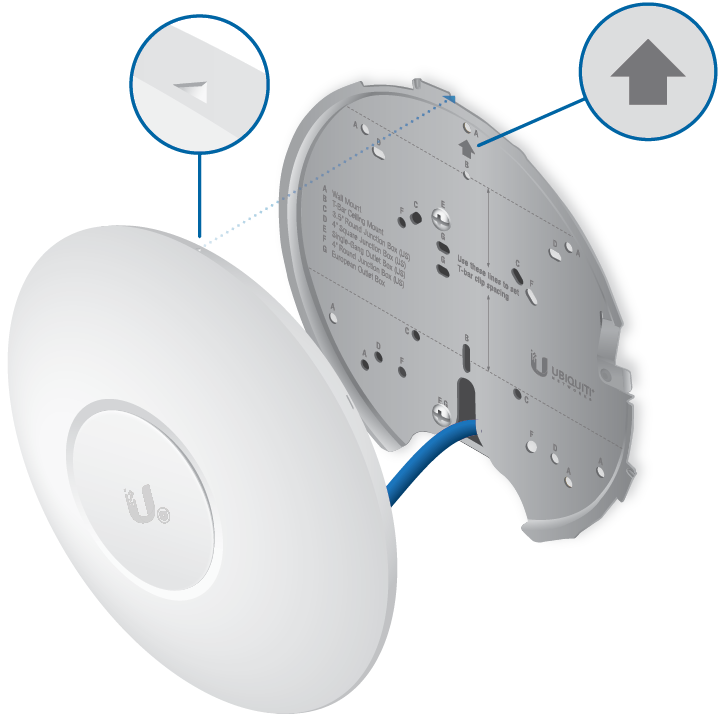
Mounting Plate
The Mounting Plate offers a variety of mounting holes for different applications. The legend printed on the Mounting Plate identifies the holes used for each application.
Hardware Installation
The UniFi AP can be mounted on a wall, ceiling tile, drop ceiling T-rail (up to 40 mm), or electrical junction box. Perform the steps for the appropriate installation.
|
|
Note for UniFi AP replacement: The holes marked “A” on the Mounting Plate line up with the holes of mounting brackets used for previous UniFi AP models. |
|---|
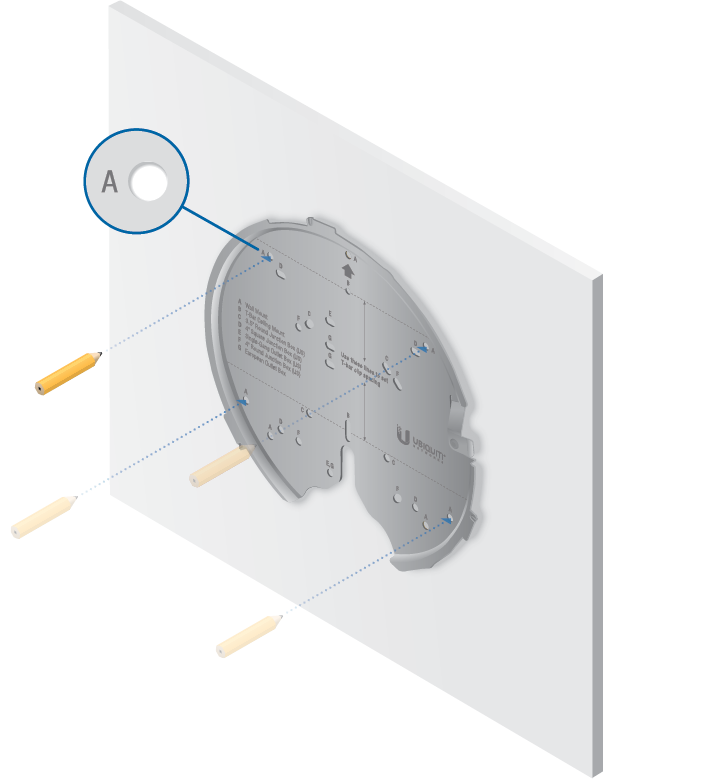
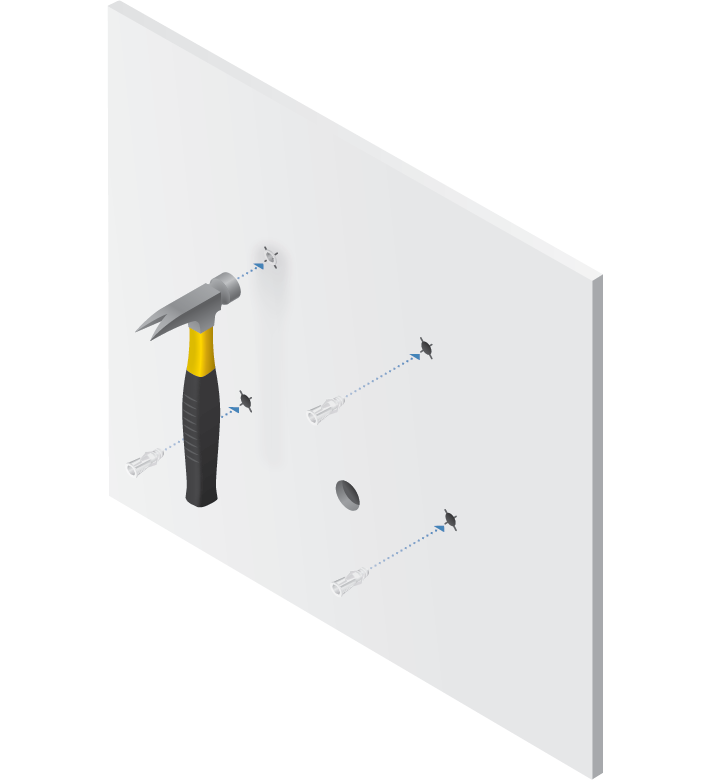
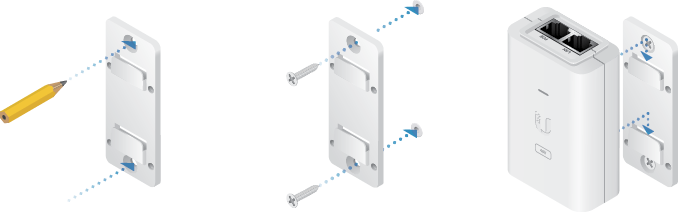
Wall Mount
Optional
Optional
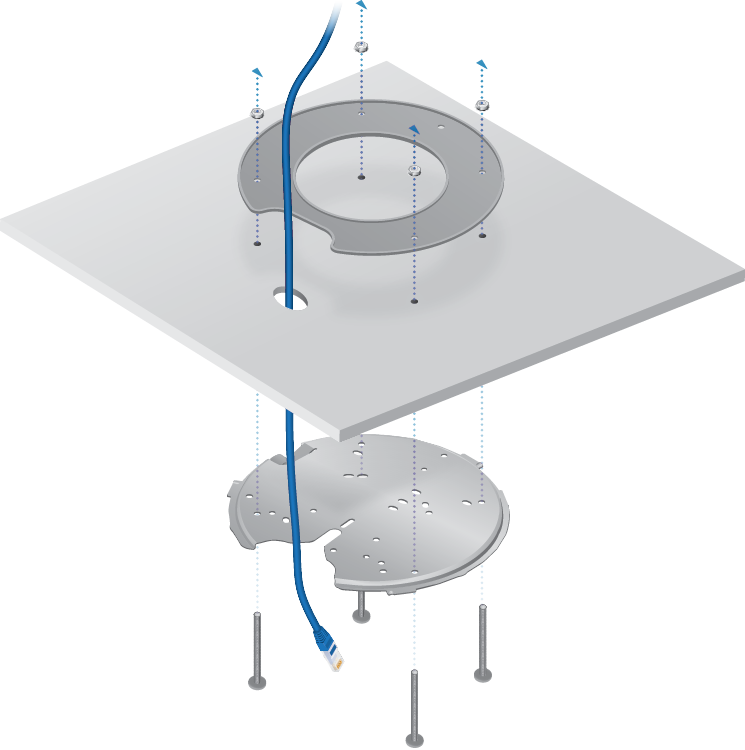
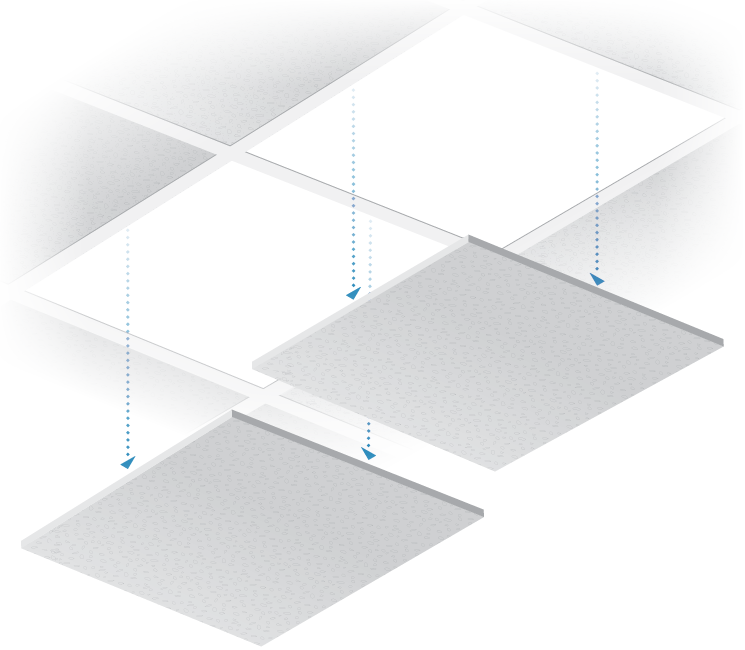
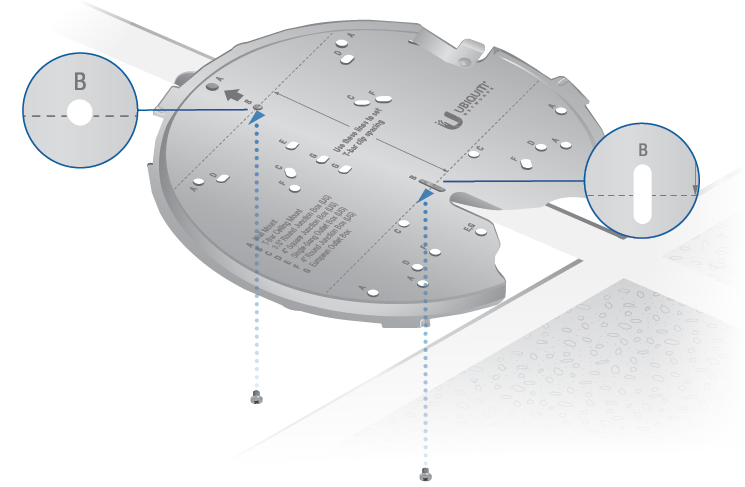
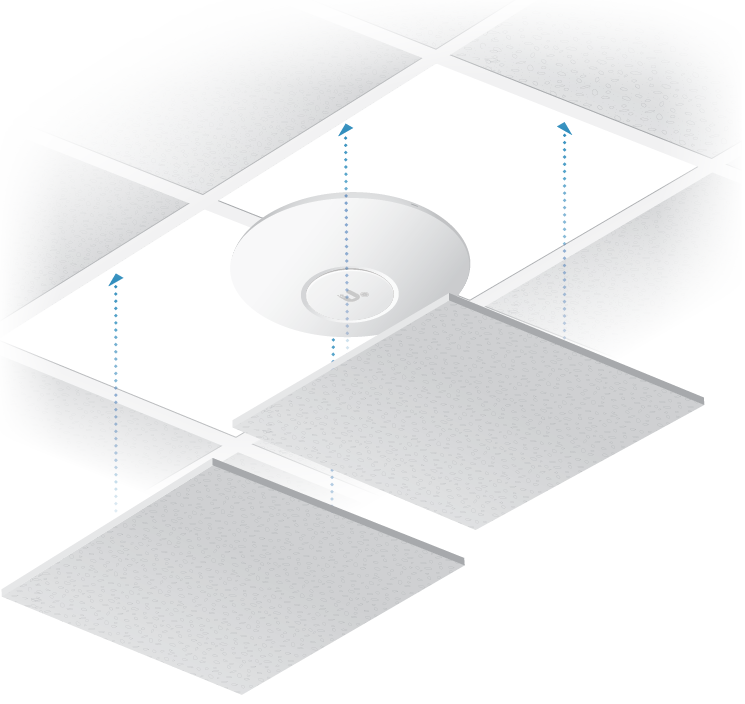
Ceiling Mount
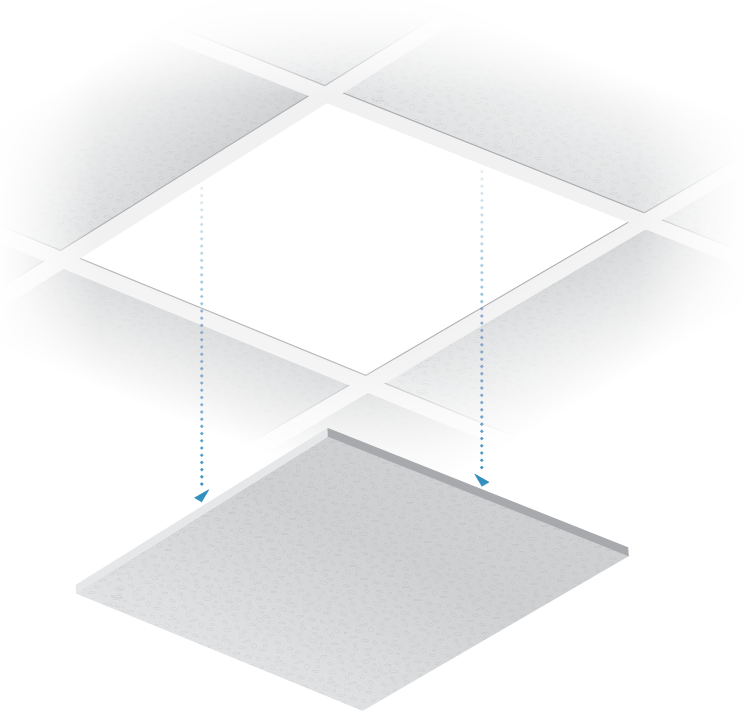


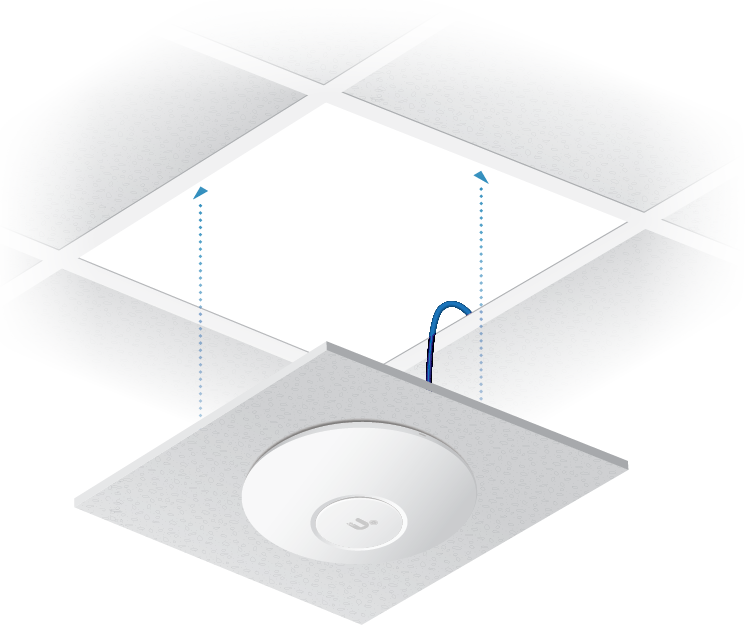
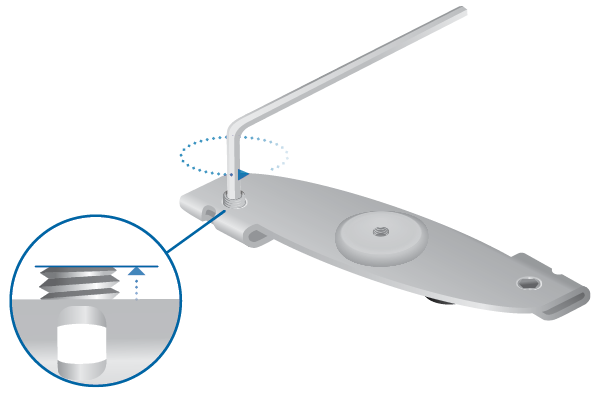
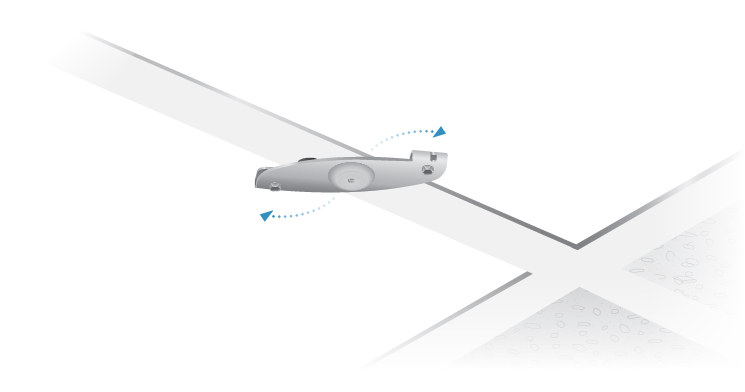
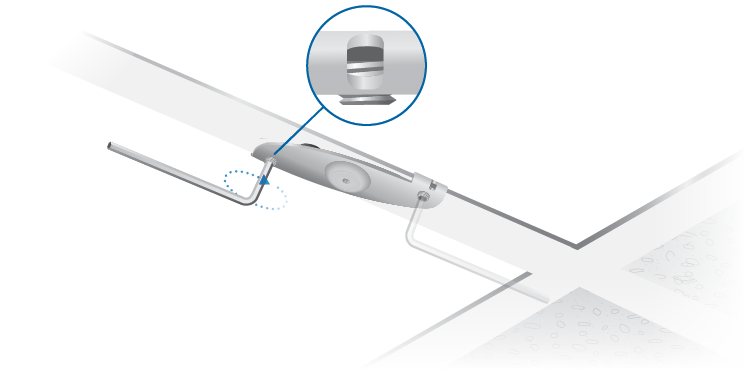
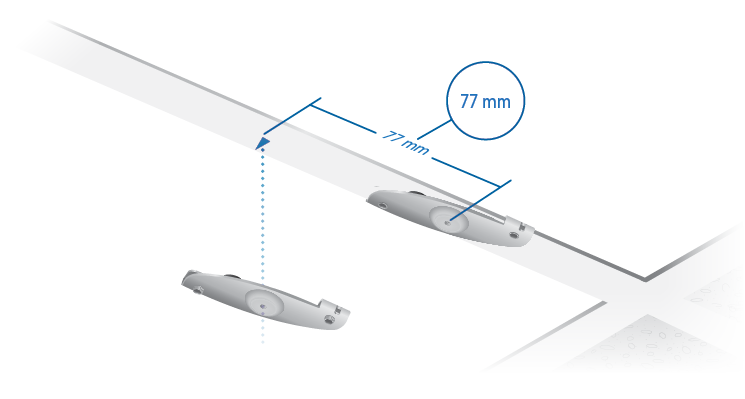
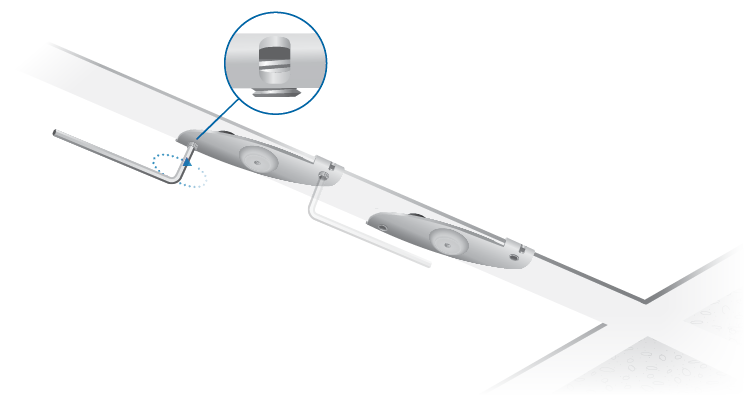
T-Bar Mount
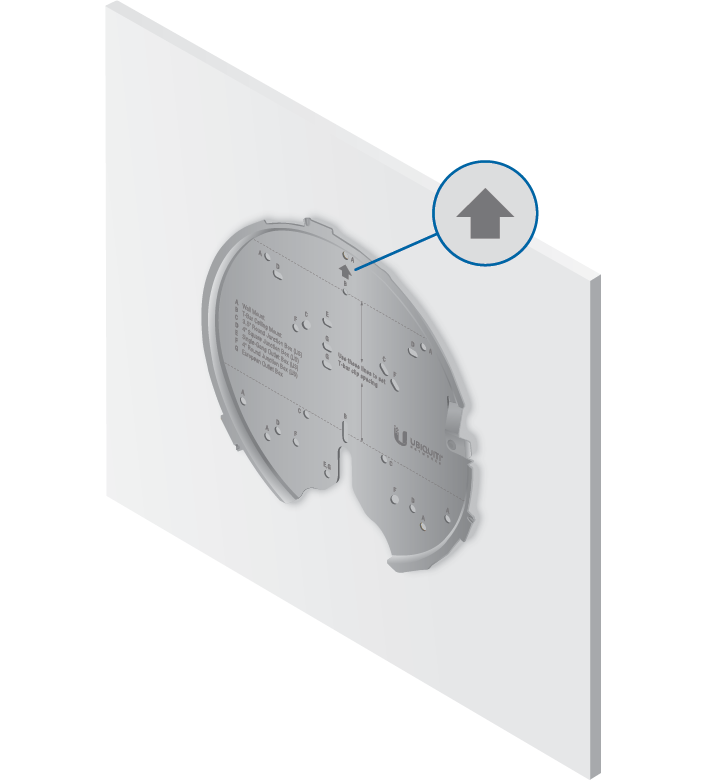
Junction or Outlet Box Mount
- Use the legend printed on the Mounting Plate to select the appropriate mounting holes for your installation.
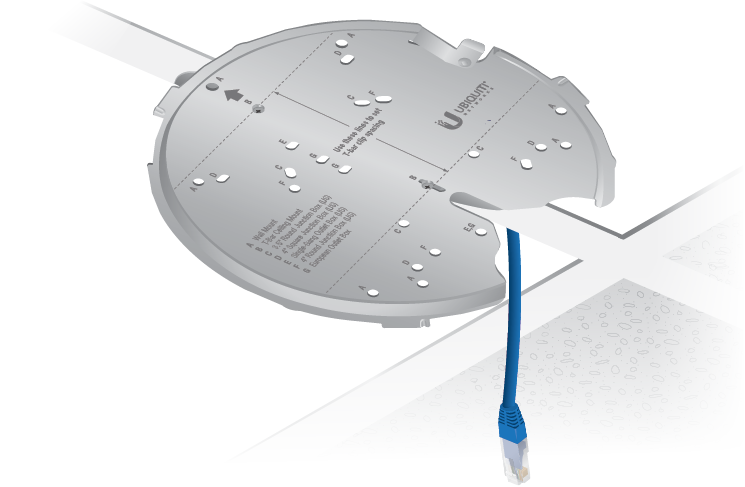
- Pull the Ethernet cable through the Mounting Plate, and attach the Mounting Plate to the junction or outlet box using at least two screws (not included).

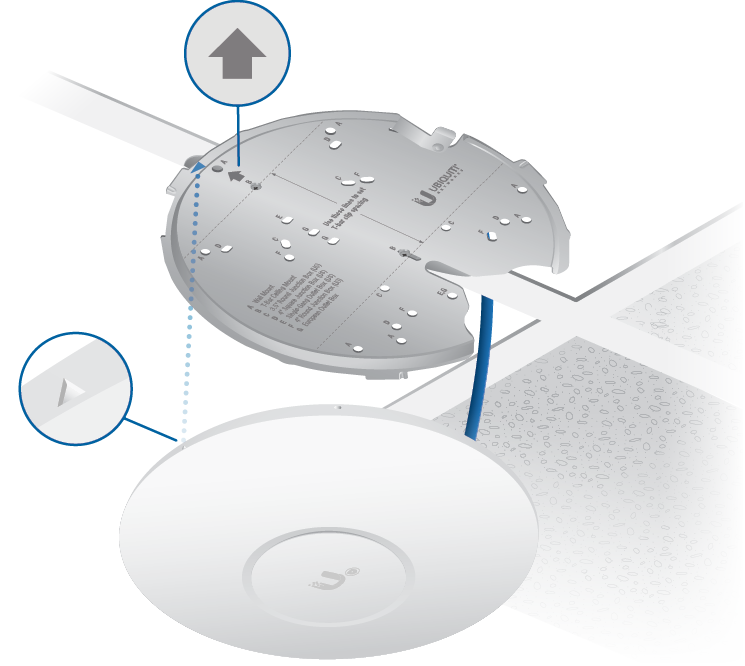
Note: For in-wall applications, position the Mounting Plate with the Arrow pointing upwards.
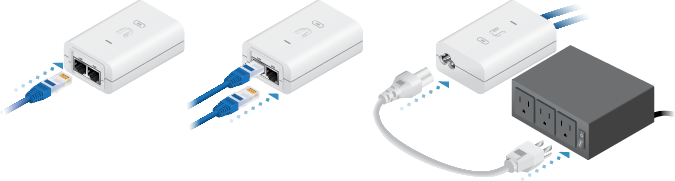
Powering the UniFi AP
The UAP-AC-SHD features auto-sensing 802.3at PoE+ support and can be powered by any of the following:
- Ubiquiti UniFi Switch with 802.3at PoE+
- 802.3at PoE+ compliant switch
- Ubiquiti Gigabit PoE Adapter (48V, 0.5A)
The single-pack of the UAP-AC-SHD includes one Gigabit PoE adapter. For multi-pack units, PoE adapters or a UniFi Switch with 802.3at PoE+ may be purchased separately.
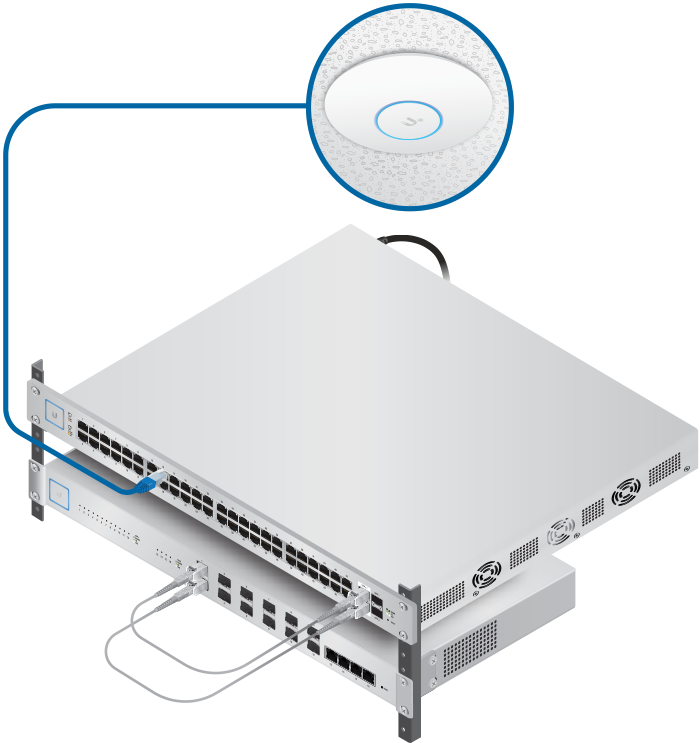
Connecting to a PoE+ Switch
Connect the Ethernet cable from the UniFi AP directly to a PoE+ port on the switch.
|
|
IMPORTANT: The UAP-AC-SHD cannot be powered by the US-8 or US-8-60W; however, it can be powered by other UniFi PoE Switches that provide 802.3at PoE+ power. |
|---|
Specifications
|
UAP-AC-SHD |
|
|
Dimensions |
220 x 220 x 48.1 mm (8.66 x 8.66 x 1.89") |
|---|---|
|
Weight |
700 g (1.54 lb) |
| with Mounting Kit | 830 g (1.83 lb) |
|
Networking Interface |
(2) 10/100/1000 Ethernet Ports |
|
Buttons |
Reset |
|
Power Method |
PoE+ 802.3at |
|
Power Supply |
48V, 0.5A Gigabit PoE Adapter* |
|
Max. Power Consumption |
20W |
|
Operating Frequency |
2.4 GHz 5 GHz |
|
Max. TX Power |
|
| 2.4 GHz | 25 dBm |
| 5 GHz | 25 dBm |
|
Antennas |
|
| 2.4 GHz | (2) Dual-Polarity |
| 5 GHz | (2) Dual-Polarity |
|
Antenna Gain |
|
| 2.4 GHz | 6 dBi |
| 5 GHz | 6 dBi |
|
Wi-Fi Standards |
802.11 a/b/g/n/ac/ac-wave2 |
|
Wireless Security |
WEP, WPA-PSK, |
|
Mounting |
Wall/Ceiling/Junction Box (Kits Included) |
|
Operating Temperature |
-10 to 70° C (14 to 158° F) |
|
Operating Humidity |
5 to 95% Noncondensing |
|
Certifications |
CE, FCC, IC |
* Included with the single-pack of the UAP-AC-SHD